Image Tags
Image classification is one of the first use cases of computer vision and many projects still use it today. To support image classification, we built our "image tags" feature that let's you add tags easily to an image, while also offering you a prediction service to speed up the process of creating tags with 2-3x.
Creating, renaming, and deleting tags
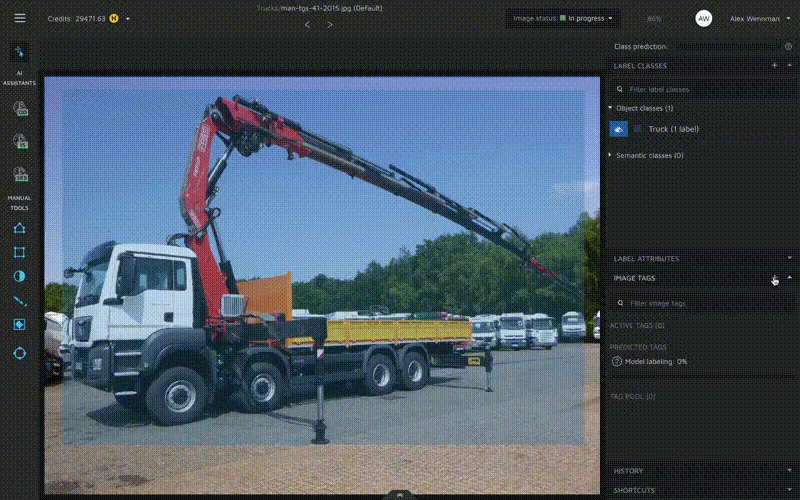
To create tags, first go to the annotation environment. Next, click on the image tags tab that can be found in the menu to the right. Now, to create a tag, click on the plus-sign that can be found in the top right corner of the view. This will open a new view.
To create a tag, write the desired tag name in the input field and then press enter. This will create your tag.

In this view, you can also rename and delete tags. To rename a tag, click on its name. This will allow you to edit it.
To delete a tag, click on the minus sign next to it.
When you are done setting up your tags, click on the arrow in the top right corner to leave the editing mode.
Assigning and remove tags from an image
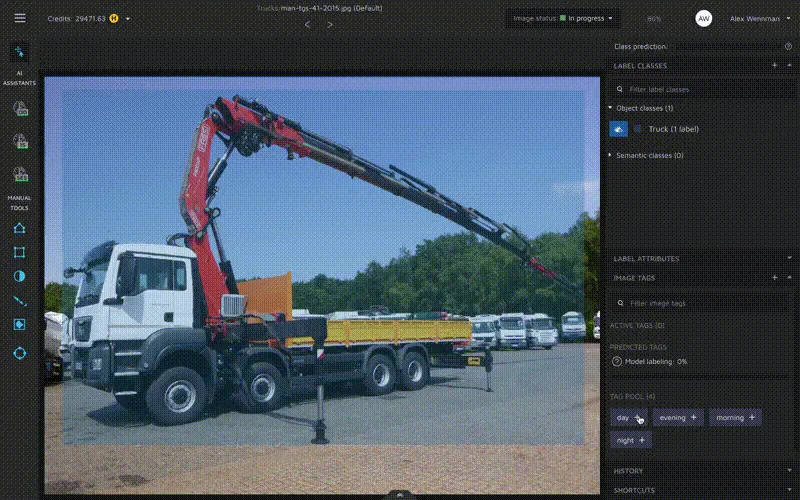
All available tags are collected in a "Tag pool". To assign a specific tag to an image, just click on it and the tag will become "Active", meaning that it is used to classify the image.
To remove a tag from an image, just click the minus sign next to it.

Using our tag prediction assistant
After you have added tags to 10 images and set their status to "done or "to review" we will train an image classification assistant. This assistant will suggest tags for every new image you view. You can accept the suggestions by clicking on them each individually or by clicking "Accept all".
Know that even if suggestions are not great after the first 10 images, they will improve the more data you add. Especially image classification need a lot of data to generate accurate results, so 40-80 images might need tags before predictions become accurate enough to be used.
