Grad-CAM
In the modern world, neural networks are a proven instrument for solving different tasks across various industries. With the development of high-level Machine Learning libraries and Deep Learning frameworks, it became easier to train a network and achieve a nice metric value. Still, boldly relying on a model that produces accurate predictions is not the best strategy. The key to success is a bit deeper and lies in understanding why a model makes a specific decision. This is where the Grad-Cam algorithm that makes the difference comes into the mix.
On this page, we will talk a bit about the Grad-Cam concept and its capabilities. Let’s jump in.
Grad-Cam explained
Gradient-weighted Class Activation Mapping (Grad-Cam) is an explainability algorithm Hasty uses to explain the results of Classifier, Tagger, Attributor, and Semantic Segmentation models.
As the name suggests, Grad-Cam is built on top of the CAM (Class Activation Mapping) method. It is complex and strongly based on mathematics, so to get a complete overview of the Grad-Cam’s concept, please refer to the original paper.
Additionally, Grad-Cam is not a “black-box“ method as it straightaway interacts with the model. Still, it does not require changes in the model’s architecture and can be applied to a broad spectrum of CNN model families.
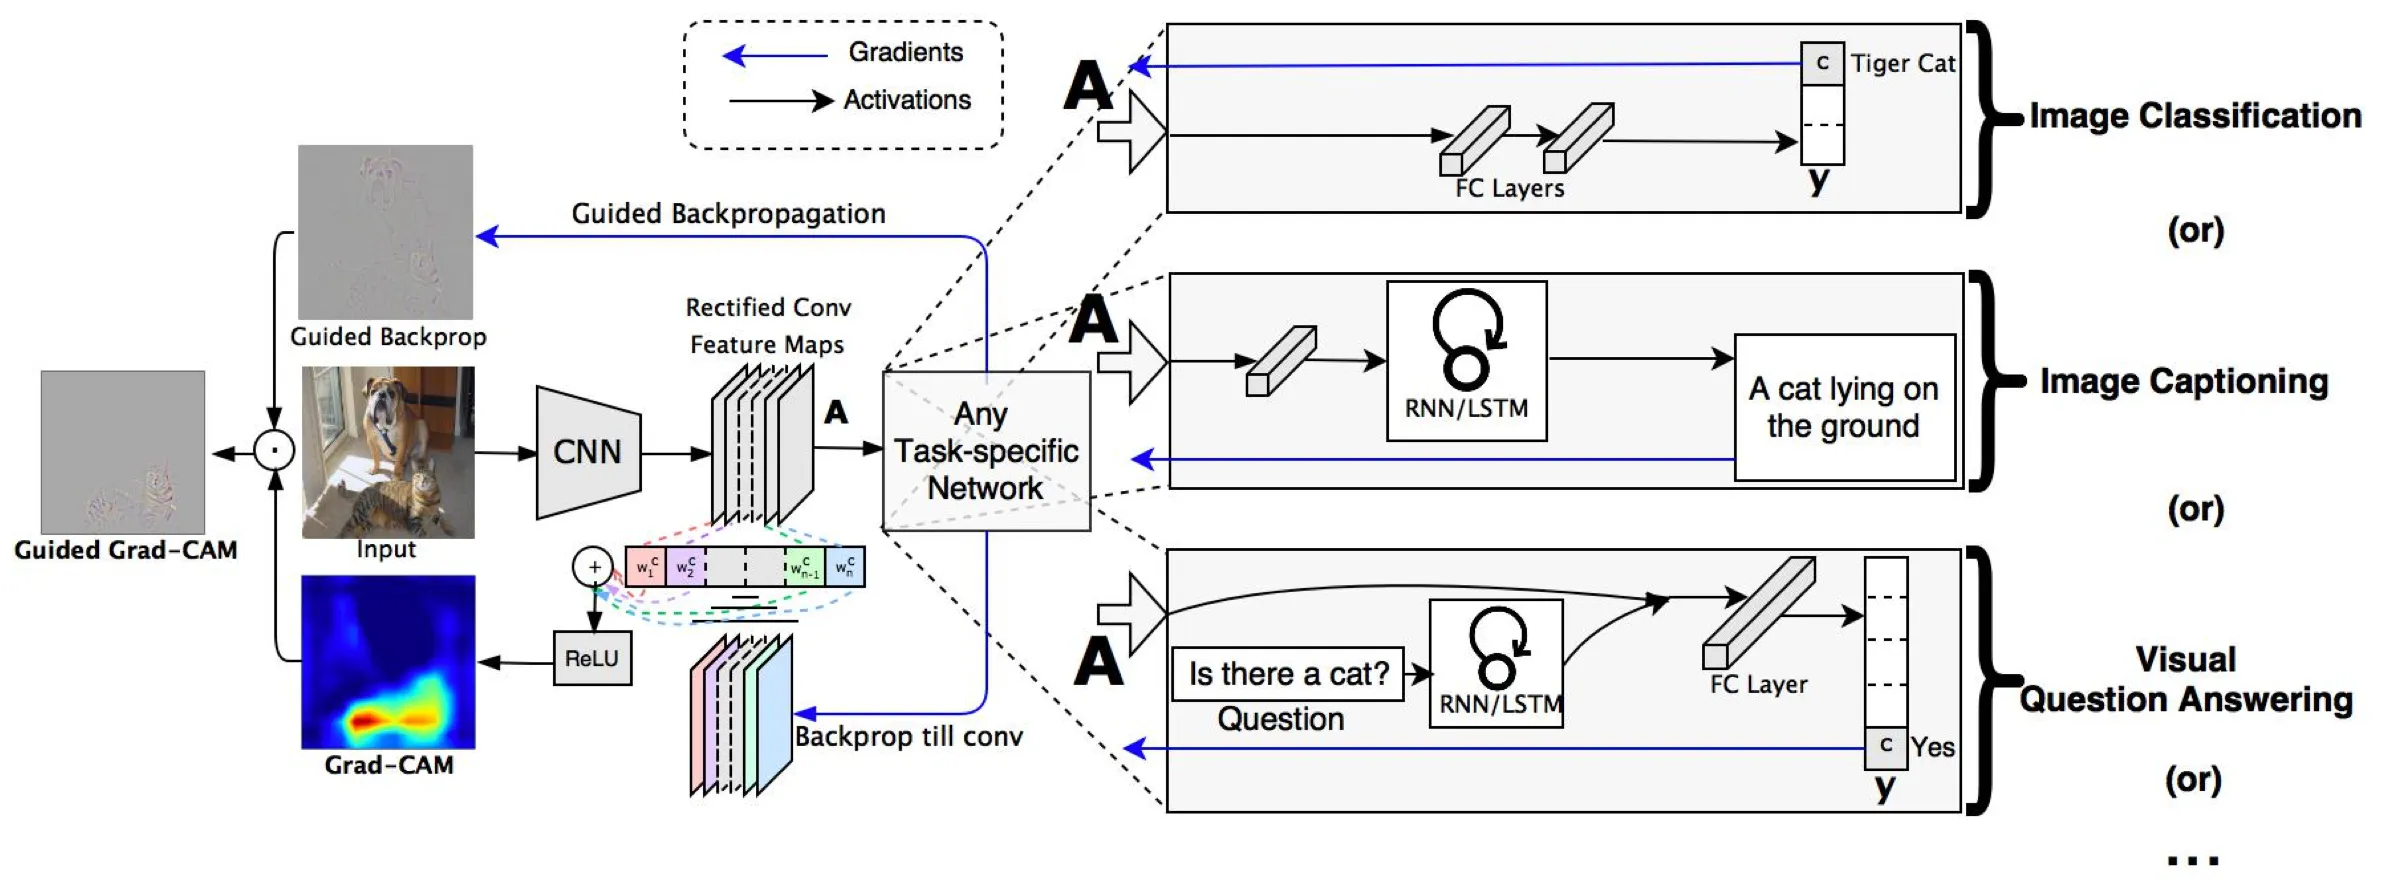
Let’s take a high-level look at the Grad-Cam’s concept step by step. The flow behind it is straightforward:
- You choose an image as an input, a prediction you want to understand, and the model’s convolutional layer that will be used to take a slice of the features (let’s call it the last layer);
- You cut the model at the last layer and add fully-connected layers that will produce a prediction based on the features you got on the last layer;
- You pass an image through the model and grab:
- A prediction;
- The loss;
- The output of the last layer.
- Concerning the model loss, you find the gradient of the output of the last layer using the backpropagation algorithm;
- You find and take the sections of the gradient that straightaway contribute to the prediction;
- You reduce, resize, and rescale these sections so that the produced heatmap would be of the same shape as the input image;
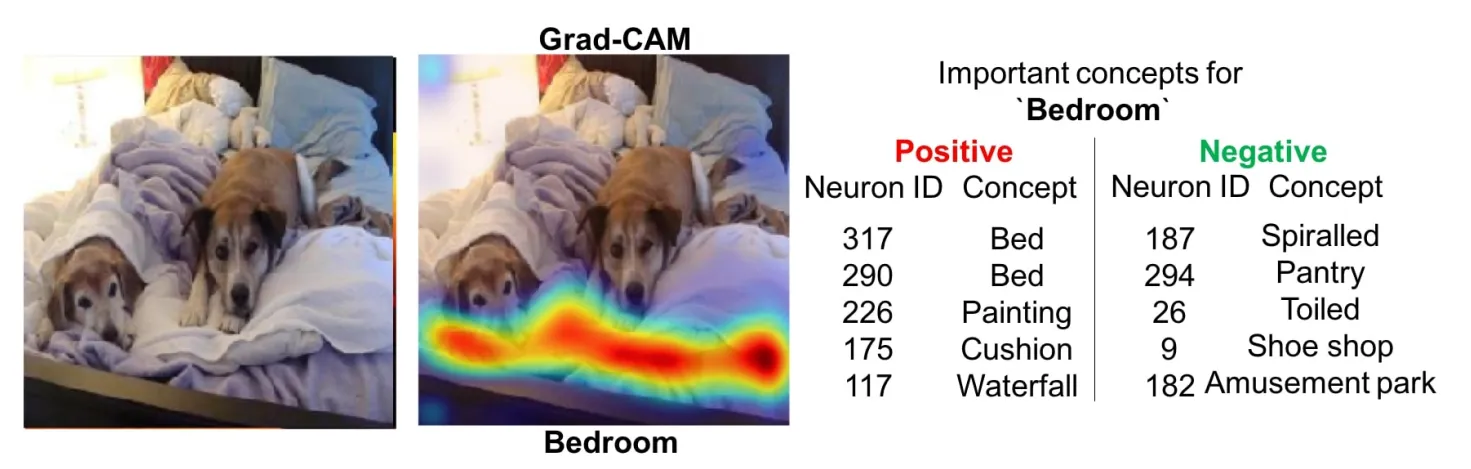
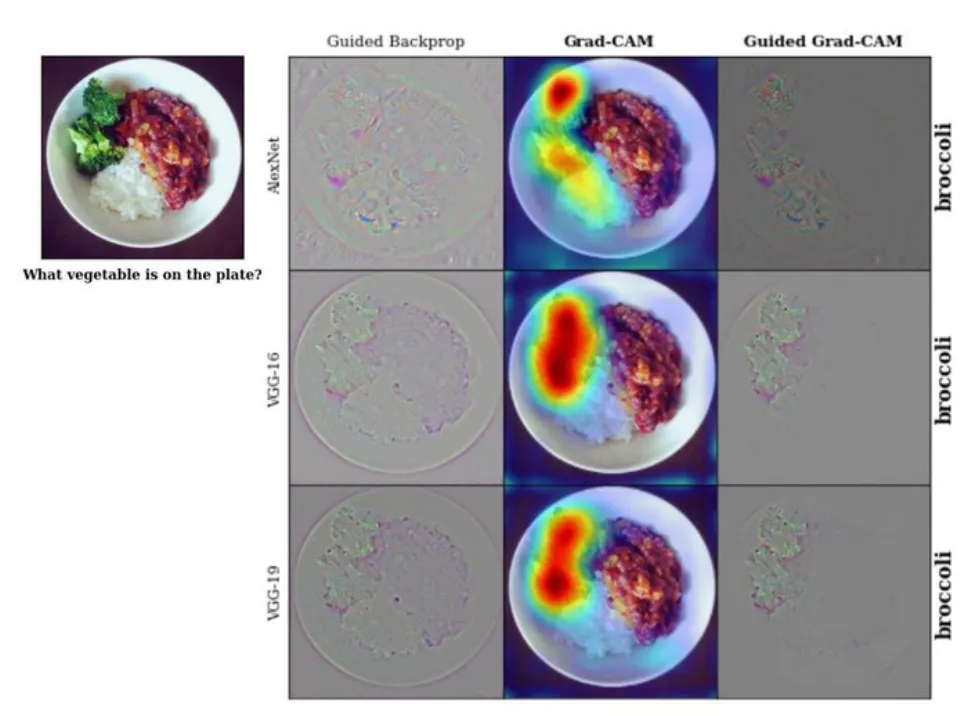
- That’s it. As a result, you get a heatmap of the most essential parts of an image.
Please note that most of these steps are automated, but Grad-Cam still requires a bit of manual work from you.
Grad-Cam visualized