Webhooks
Nowadays, we use many applications to make our life easier, for example, Amazon to do online shopping or Gmail to send work emails. With the growing need for online services, the interaction between applications has become vital.
Automating the process of communication between various applications is facilitated by Webhooks.
On this page, we will answer the following questions:
- What are webhooks;
- When webhooks are used;
- How to use the Webhooks feature in Hasty.
Let's jump in.
What are Webhooks
Webhooks are HTTP requests triggered by some event (change of state). They allow applications to send real-time information to other apps.
- The triggers can be massively varied: for example, you receive an email whenever someone requests to become your LinkedIn friend, or online stores get a notification when a user pays for an order.
- An example of an event for Hasty is when the user changes the image status. If such an event occurs, it will trigger an HTTP request, and the other side - for instance, the annotation team - will automatically receive a notification.
The difference between Webhooks and standard API is that the latter uses the Pulling strategy to check for updates. It means that from time to time, the system has to send requests to another application to see if any changes have occurred.
In comparison, Webhooks use the Pushing strategy. With this approach, the application only sends notifications to the system when the event has already happened.
The general pipeline of creating Webhooks
Overall, to set up a webhook, you need to pass through three steps:
- Get the webhook URL from the application which you want to notify;
- Put that URL in the webhook section of the application from which you wish to receive updates;
- Specify the events about which you want the application to notify you.
Using Webhooks in Hasty
To use webhooks, first, you need to register a URL to notify you that the event has occurred.

URL is an address that receives the data sent by one application to another. When any event occurs, Hasty makes an HTTP request to the URL configured for the Webhook.
This URL can be configured to cause events in other systems. Since Webhooks also use HTTP requests, these requests can be integrated into any web-based platform. Thus, it is possible to integrate Hasty with various other systems.
How to create a Webhook in Hasty
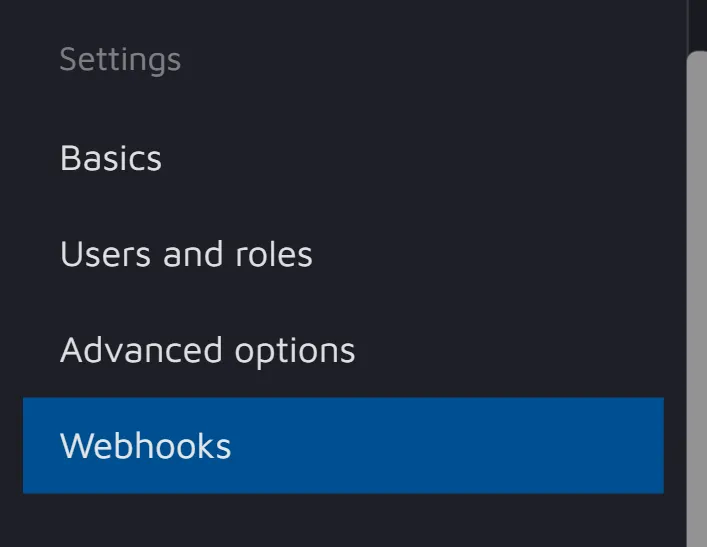
1. Firstly, go to Webhooks in the project dashboard.
2. Click on the Create new button to register a URL for the webhook.
3. Specify:
- The name of the Webhook;
- The event that will be triggering the Webhook;
- The URL to which the requests will be sent;
- Optionally, you can describe the event and the response to it.
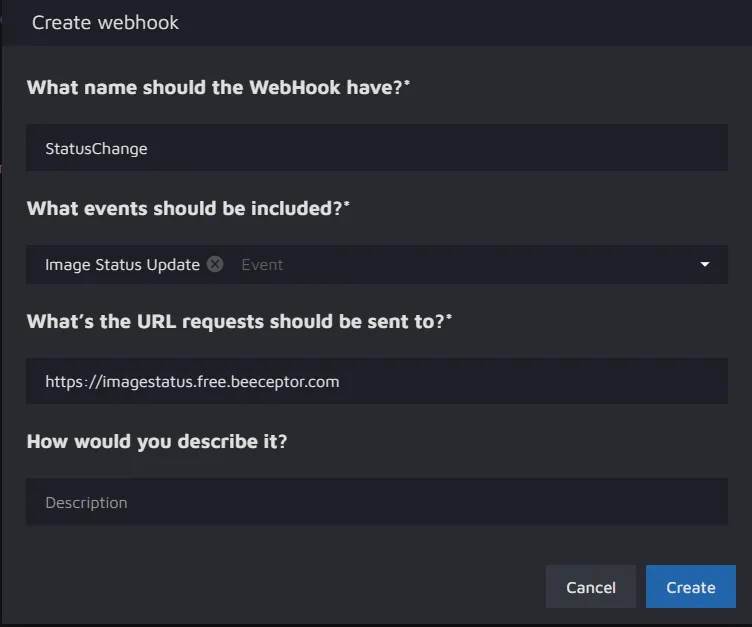
In our example, the Webhook is called "StatusChange," and the triggering event is the "Image Status Update."
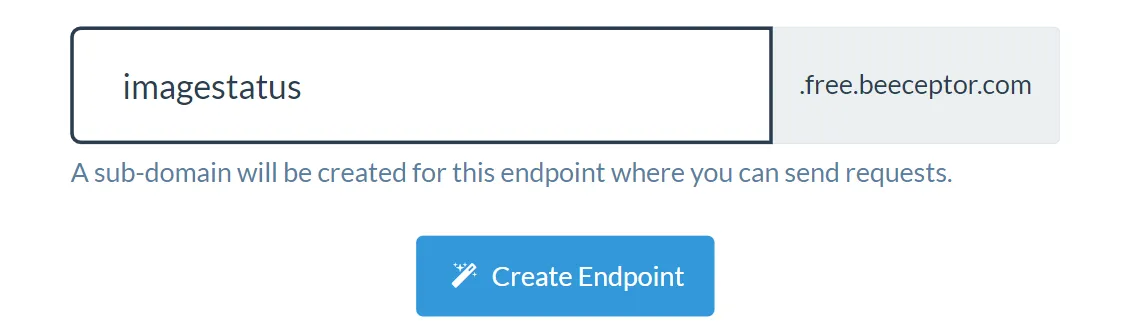
As mentioned earlier, you must register a URL to use the webhook. We used Beeceptor to create a URL. In this example, the name used to create an endpoint was "image status."
You can view the webhook payload (the data about the event) in JSON format using the URL.
4. After filling everything in, click Create to set up a Webhook.
5. To see the payload delivered after the event, you should first change the image status of any images in the project.
6. Then, in the Beeceptor, you should see a new POST request.
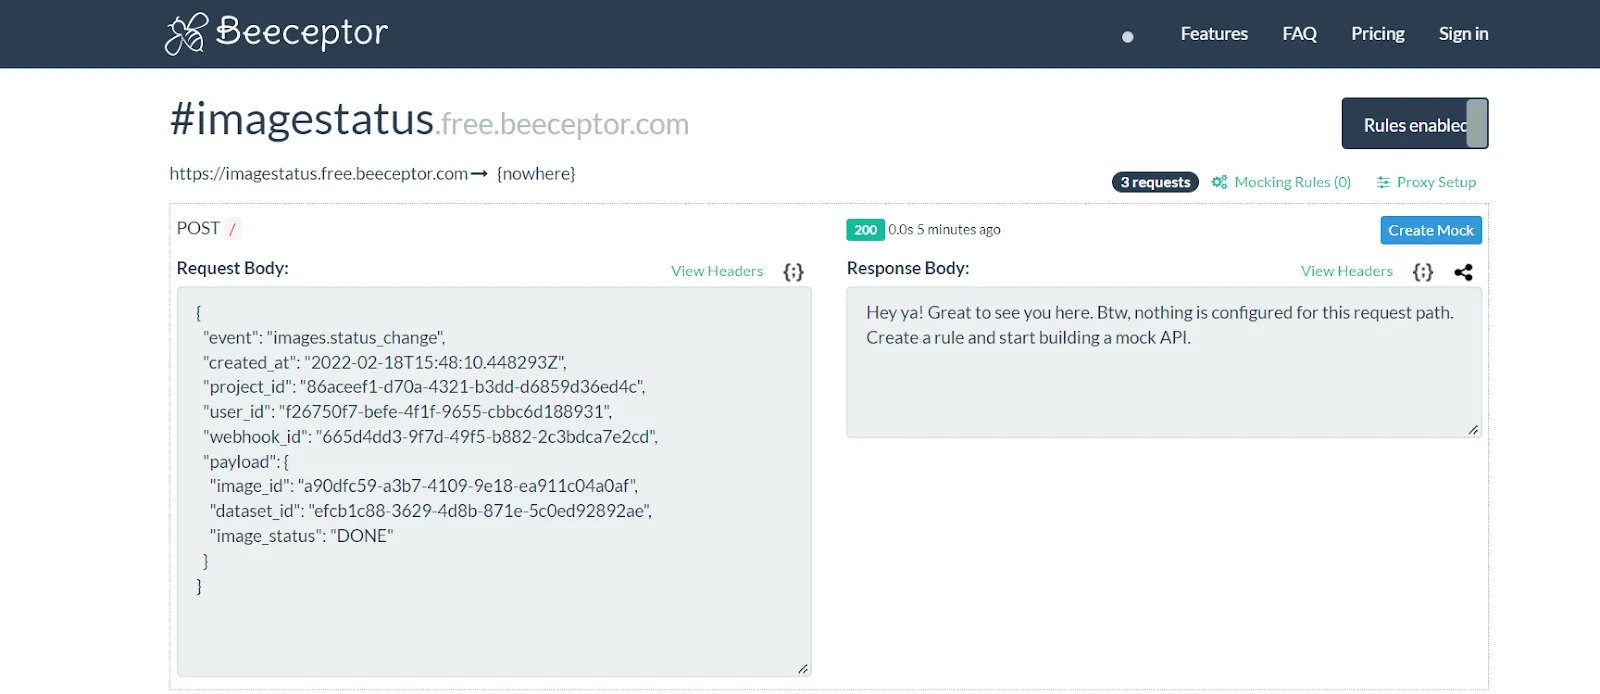
If you click on that POST request, you should be able to view the JSON webhook payload. Here we can see:
- the event;
- the date when it was created;
- the project and image ID;
- the ID of the user who changed the image, and other data related to the event.
This JSON file could be parsed and used in any custom server to respond to this event.
We hope this page was helpful for you. Contact our support team if you have any further questions.